

Ever wondered, “What is quilting?” You are not alone. At HandMade Keeps, we meet many beginners who want to start but do not know where to begin. This guide will walk you through every step in the simplest way possible. No fancy terms. No fluff. Just real steps and helpful tips for your first quilt. Whether you're curious or ready to thread the needle, this guide is your starting point.
What Is Quilting?
Quilting is the process of stitching three layers of fabric into one. These include the quilt top (which often has a design), a middle layer called batting, and a backing layer.
Unlike regular sewing, quilting always uses three layers and often includes patterns. It is done by hand or with a sewing machine.
In the U.S., quilting dates back to colonial times when families stitched scrap fabrics into blankets. Over time, quilting became both a practical task and a creative hobby.
Why Quilting Is So Popular in the U.S.
Quilting is more than a hobby—it is part of American tradition. Many families pass down handmade quilts through generations.
It is also popular for stress relief and creativity. Today, quilting is trending again due to online tutorials and communities that make it easy to learn.
The Three Layers of a Quilt Explained
Every quilt includes:
Top layer – This shows your design, usually patchwork
Batting – The fluffy middle layer for warmth and texture
Backing – The plain bottom layer that holds everything together
All three layers are stitched using patterns to keep them in place.
Tools and Materials You Need to Start Quilting
Here is what you need to start:
Fabric – 100% cotton works best for beginners
Rotary cutter – Our Patchwork Rotary Cutter helps cut shapes cleanly
Cutting mat – A Quilters Cutting Mat protects your surface and improves accuracy
Ruler – Helps measure and cut straight lines
Thread and needles – Cotton thread and sharp needles for quilting
Sewing machine – Optional, but speeds up the process
Iron and ironing board – Helps flatten seams for clean lines
Pins and safety pins – Keeps layers in place before sewing
You can find beginner-friendly quilting tools on HandMade Keeps like the Quilt Cutting Template and our Multi-Craft Fabric Template. We also offer Shipping Protection to keep your orders safe.
Hand Quilting vs. Machine Quilting
Hand quilting takes longer but offers personal touch. Machine quilting is faster and good for large pieces.
Beginners may start with hand quilting to learn control, but a sewing machine helps complete projects faster.
Basic Quilting Terminology You Should Know
Patchwork – Sewing pieces of fabric together
Batting – Middle fluffy layer
Binding – Edge of the quilt that seals all layers
Appliqué – Sewing shapes onto the quilt top
Piecing – Joining fabric patches to make the quilt top
Sashing – Strips between blocks
Quilting stitches – Patterns used to stitch the layers
Quilting Safety Tips for Beginners
Use rotary cutters with safety locks
Keep your workspace clean
Sit with proper posture to avoid strain
Take breaks to rest your eyes and hands
How to Choose Your First Quilting Project
Start with something simple:
Mug rugs
Baby quilts
Mini quilts
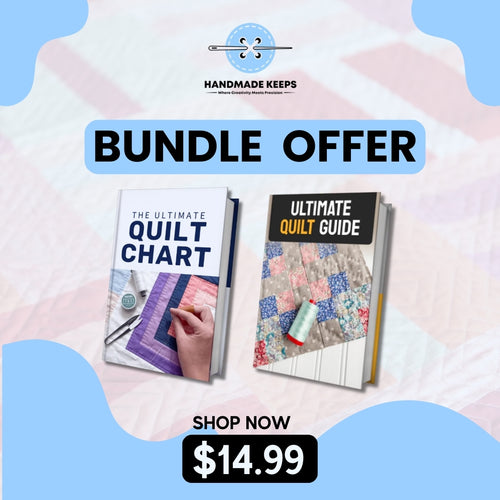
If you need beginner-friendly instructions, check out our Ultimate Bundle of Quilting Guides for quick reference and ideas.
Step 1: Plan Your Quilt
Pick a simple pattern that uses squares or rectangles. Choose colours that go well together. Make a list of the fabrics you need. Measure before buying. Use guides like The Ultimate Quilt Chart to help plan dimensions accurately.
Step 2: Cut Your Fabric Pieces
Use a rotary cutter and a Quilters Cutting Mat from HandMade Keeps. A ruler helps keep edges straight. Label your pieces with masking tape to stay organised.
Step 3: Piece the Quilt Top
Sew your fabric pieces together row by row. Press the seams with an iron after each step. This keeps your quilt top flat and smooth. Check that corners meet properly.
Step 4: Layer the Quilt Sandwich
Place the quilt top on a flat surface. Add the batting in the middle, then the backing fabric at the bottom. Use safety pins to hold all three layers in place.
Step 5: Quilting the Layers Together
Now stitch all the layers together. You can use a method like “stitch in the ditch,” which means sewing along the seam lines. For creative patterns, try hand stitching or machine quilting with loops or straight lines.
Step 6: Add Binding to Finish the Quilt
Binding is the fabric strip that wraps around the edge of the quilt. Fold it in half, attach it to the edge, and sew it in place. You can sew it by hand for a clean finish or use your sewing machine.
Where to Find Quilting Classes and Communities in the U.S.
You can learn online or join local groups.
Some top names include:
American Quilter’s Society
Missouri Star Quilt Company
Joann Fabrics workshops
Facebook groups and local guilds
Mistakes to Avoid on Your First Quilt
Skipping ironing can make your quilt look messy
Use cotton thread that matches your fabric type
Do not start with hard patterns like stars or triangles
Always double-check measurements before cutting
Top Quilting Resources for Beginners
Books – Try “Quilting for Dummies” or “The Quilting Bible”
YouTube – Missouri Star Quilt Company has easy tutorials
Podcasts – Listen to "Just Wanna Quilt"
Blogs – Visit HandMade Keeps often for tips and quilting templates like our Quilt Cutting Template – Free Gift Offer
FAQs
Is quilting hard for beginners?
No. Start with a simple pattern and basic tools. Take it step by step.
Can I quilt without a sewing machine?
Yes. Many people quilt by hand. It takes longer but works well for small projects.
How long does it take to finish your first quilt?
It depends on the size. A small quilt can take a few days. A larger one might take weeks.
What fabric is best for quilting?
Use 100% cotton. It is easy to cut, sew, and press.
Can kids learn quilting?
Yes. With help from an adult, kids can enjoy small projects and grow their skills.
Final Tip
Quilting is a rewarding hobby that gets easier with time. With tools from HandMade Keeps and the steps above, you can complete your first quilt with confidence. Start small, stay patient, and enjoy the process. Let your first stitch lead to a lifelong hobby.